Project Ssongg Day 4 - Practice of Geogebra Simulation / Heart Pattern
[PART 2 PRACTICE]
1. Geogebra simulation
[Pattern specification]

- Wood Panel Size: 20cm x 20cm
- Circle Size: 15cm x 15cm
- No. of Nail holes: 60
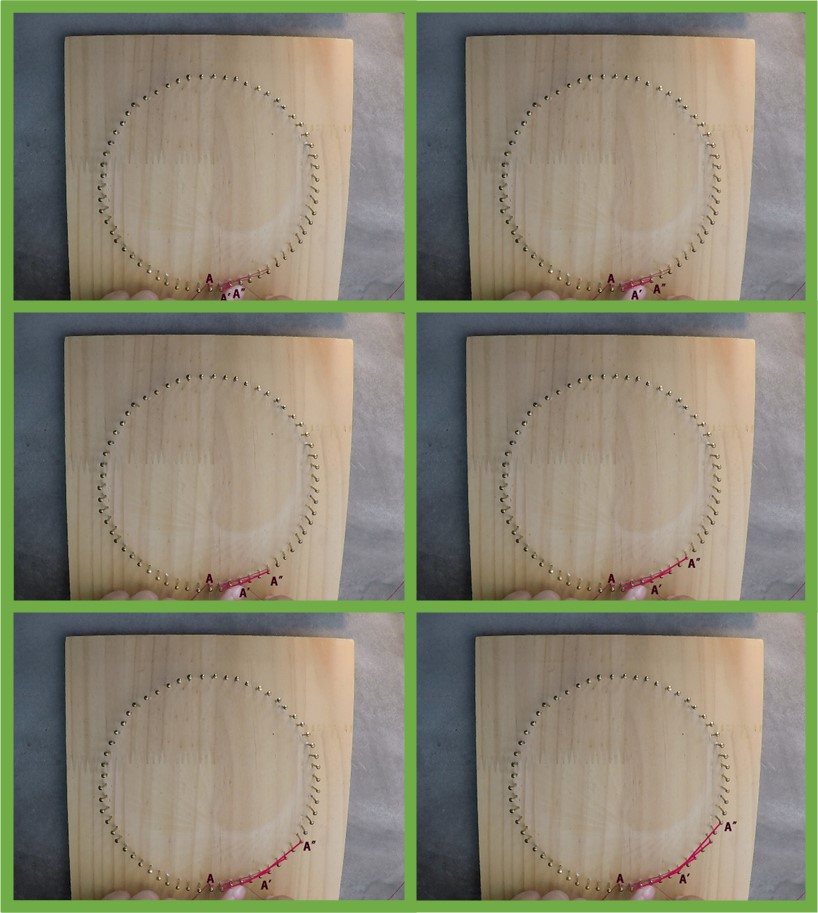
As there are 60 nail holes around the circle,
360º of the circle is divided by 60 and the part occupied by arc 12 is 360 º /60 = 6 º .

And this heart pattern is trace of the line segment A’-A”.
A’ and A’’ are variables since a is changed from 0 to 60. (60 is the number of the points marked as nail holes.)
A’ is the point rotated from A by [6 x a ]º and A’’ is the point rotated from A by [12 x a] º.
This rule can be explained and shown easily using Geogebra.
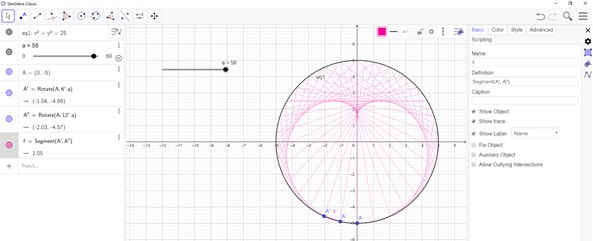
First of all, we will input the function of circle. As this heart pattern is not related to the radius of circle but related to the angle rotated, any number can be input as radius of circle. We input 5 as radius of circle in this simulation.
![]()
[GEOGEBRA INPUT]
1. Let's input functuin of Circle : X^2 + Y^2 = 5^2 = 25
( function of circle is X2 + Y2 = r2 where r is radius.)

2. Slider set up: 0 ≤ a ≤ 60 by increment 1
(It means a is variable changing from 0 to 60 by 1 such as 0-1-2-3-...- 58 - 59 - 60)

3. Set the starting point A=(-5,0)
(A is starting point and fixed point)

4. Set A’ & A”
- A’=Rotate(A, 6 ºa)
- A”=Rotate(A, 12 ºa)
A' and A'' are points changing as variable a is changing.

4. Set segment A’-A’’
After clicking [segment] icon in toolbar, we can draw segment by click the point A’ and A’’ continuously.
Then segment f will be generated.

or you can input in Algebra section f= segment(A', A'').
5. Set Trace Option
After clicking following icon in right upper section,
![]()
![]() we can change color and thickness of segment f.
we can change color and thickness of segment f.
[Color Change]

[Thickness Change]

Also, we can check “show trace” and trace of ‘segment [f]’ as ‘slider [a]’ is changing from 0 to 60.
[Check ‘Show Trace’]

After click [f = Segment (A’,A”)], click following icon.
![]()
![]()
and check ‘Show trace’.

Let’s click following icon.
![]()
![]()

and here is heart pattern we would like to make with Stringart.
![]()

![]()


Comments
Post a Comment